
Guide
Getting started: a complete walkthrough
Everything below is real. The screenshots come from Riverside State University, a demonstration institution we keep populated with a finished term and a live assessment window, so the numbers in the pictures match the text beside them.
Nothing here costs anything. There is no trial, no card, no per-student charge and nothing to upgrade to.
Prefer to poke at it? Open the demo and you are
signed straight in as Riverside State's careers director, with no signup. Change anything you
like: it is rebuilt every hour.
Before you start
You need two things: a list of students with email addresses, and about fifteen minutes. You do not need a purchase order, a security review signed off first, or your IT department.
You do not need your students to do anything yet. Nothing reaches them until you decide it does.
Step 1: Create your institution
Go to app.careerreadinessreport.com/register and give your institution's name, your name, your email and a password.
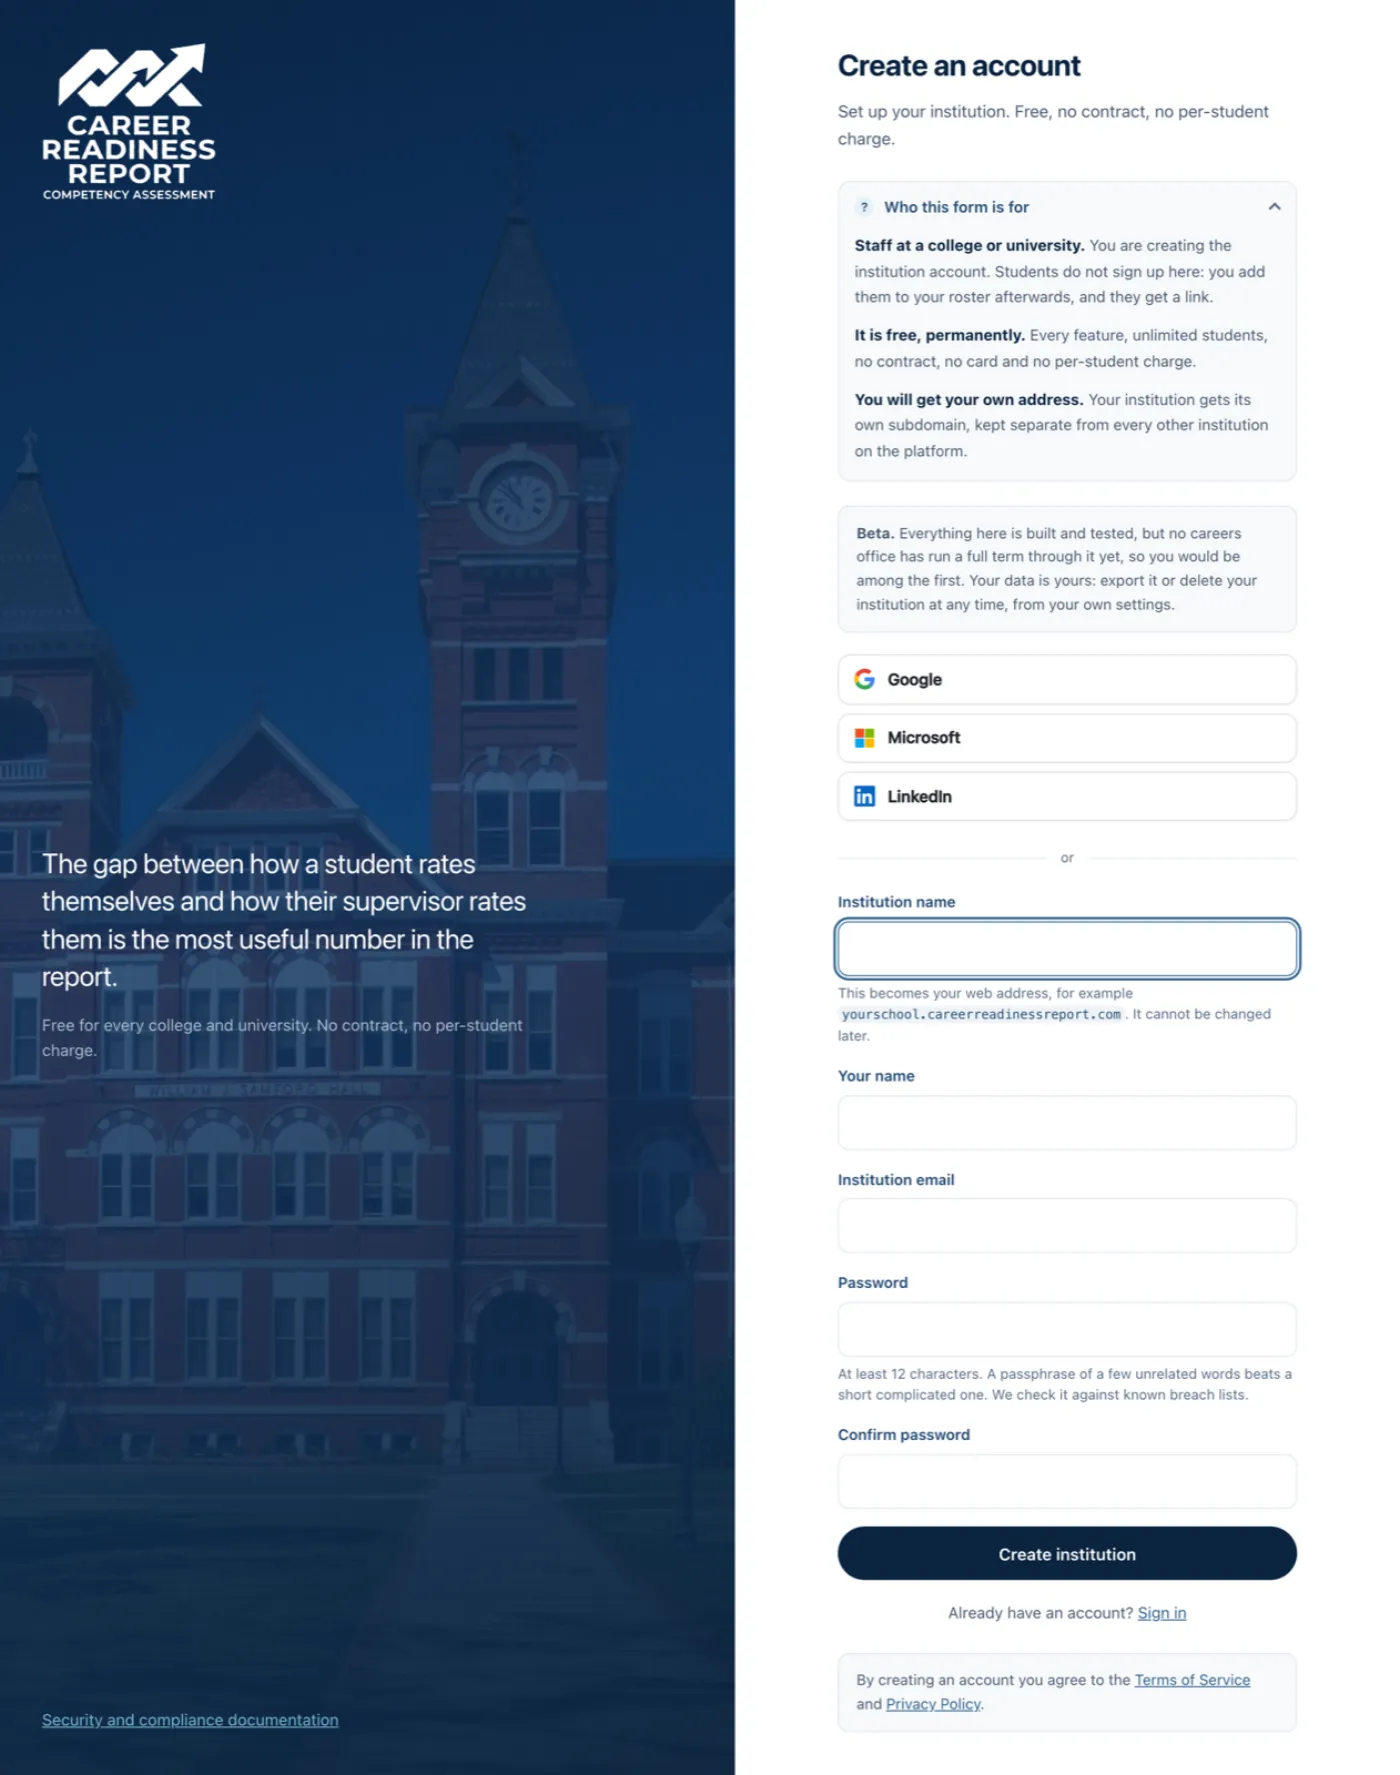
Your institution gets its own web address, like riverside-state.careerreadinessreport.com. Everything you and your students do happens there, kept separate from every other institution on the platform. You can change your display name later; the address stays.
Whoever signs up owns the account. You can invite colleagues afterwards.
Step 2: Find your way around
The dashboard shows a checklist of where you have got to, and what the next thing to do is.
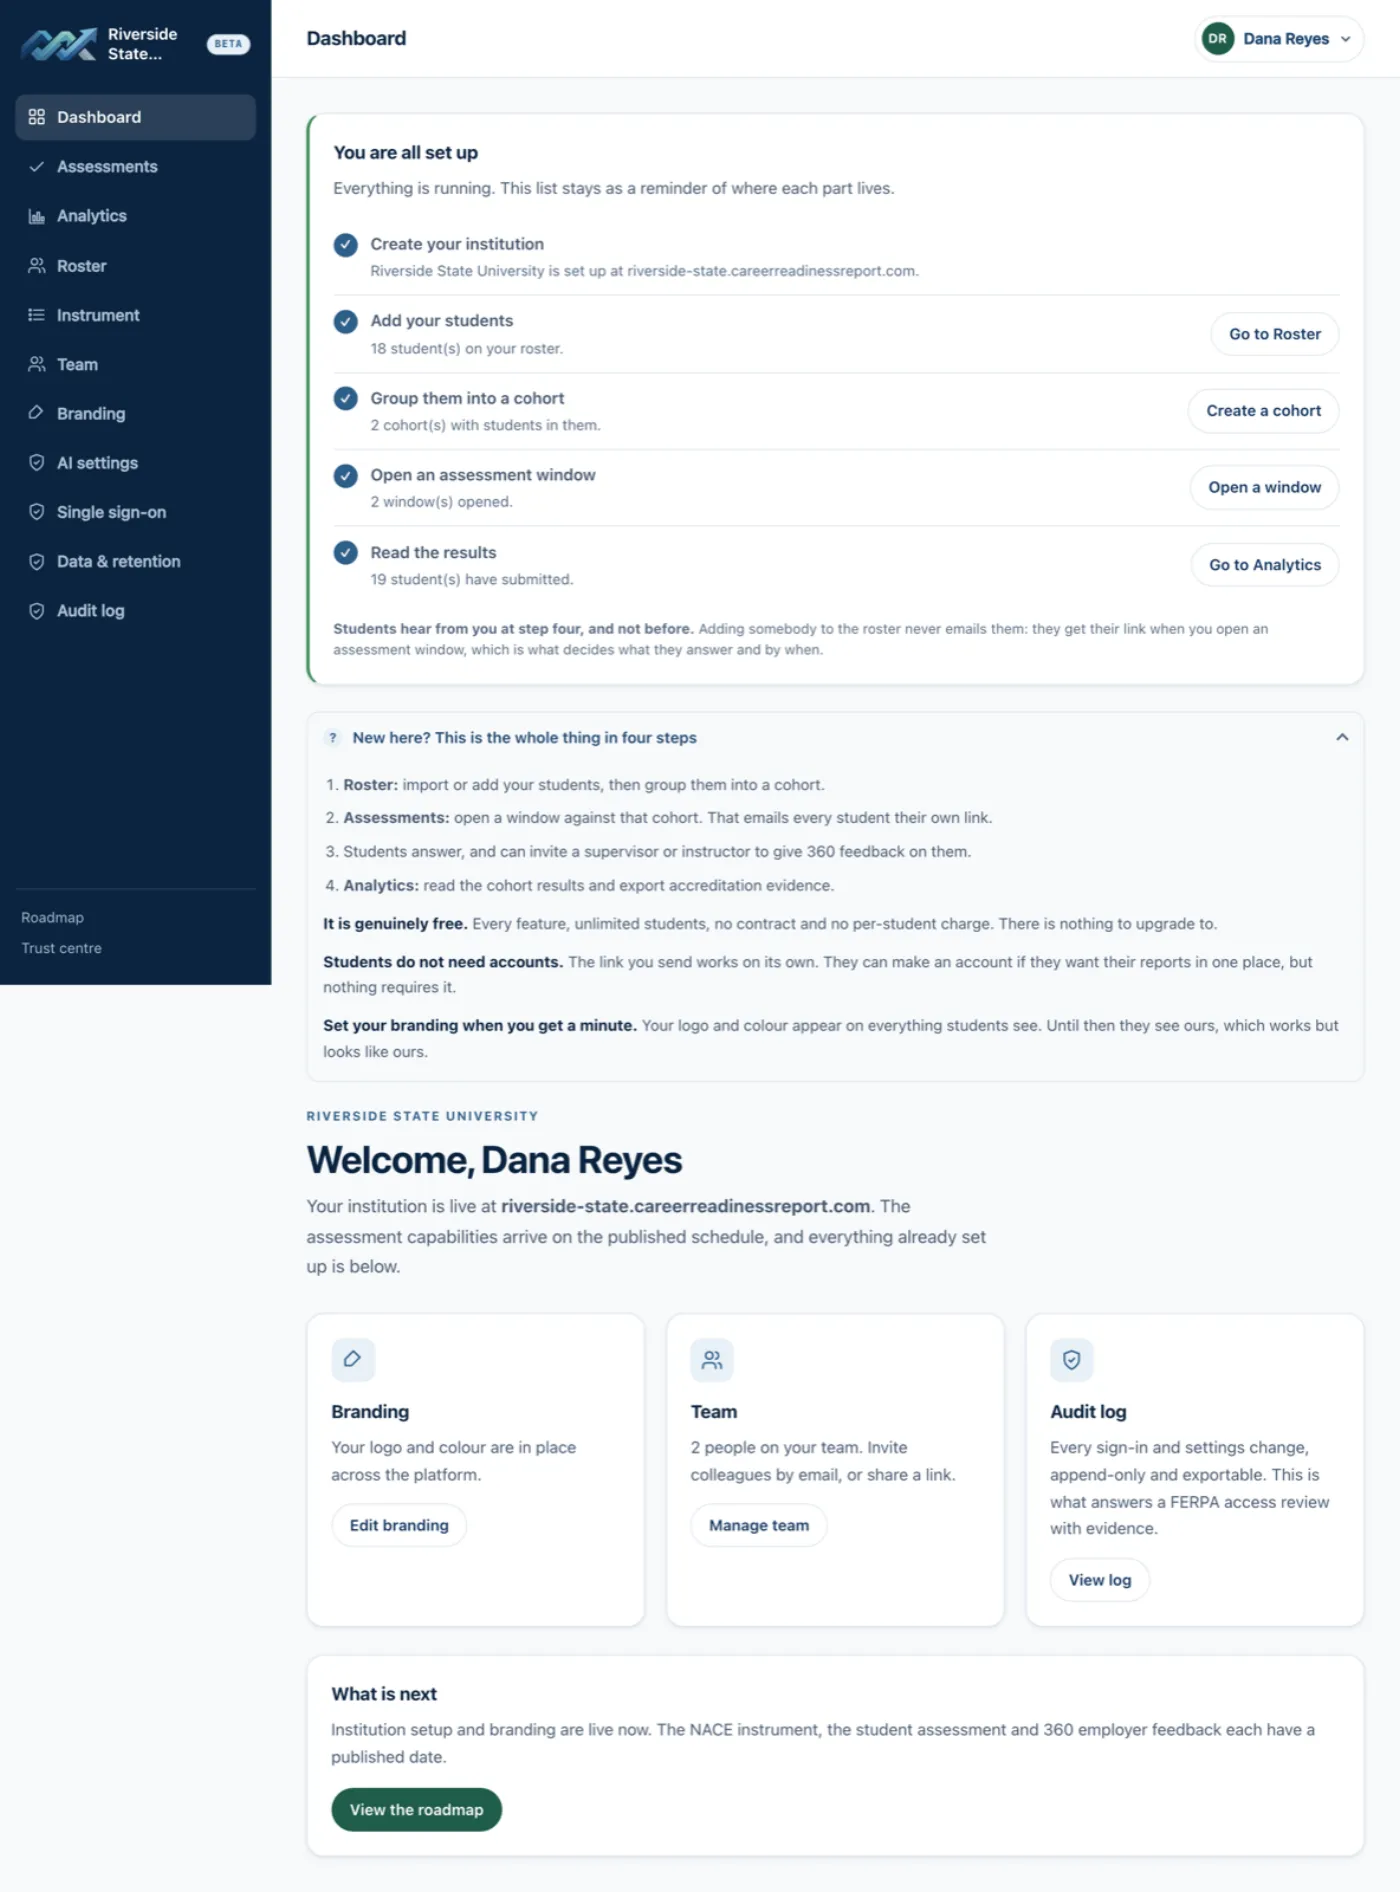
The sidebar has everything else. The three you will use most are Roster, Assessments and Analytics, in that order, and that order is the whole product.
Step 3: Add your students
Open Roster. You can import a CSV or add students one at a time.

For a CSV, the only columns we need are first name, last name and email. Anything else you include (student ID, major, class standing) is kept and becomes available as a filter in reporting later. Export from your student information system as CSV rather than Excel.
You always see a preview before anything is written, and re-importing the same file updates people rather than duplicating them, because we match on email address.
The email address matters more than anything else on this page. It is where the assessment
link goes, and it is what we match on if a student later sets up an account. A typo produces a
student who never hears from you and cannot fix it themselves.
Adding somebody to the roster does not email them. This surprises people, so it is worth saying plainly: you can build your entire roster weeks before anybody hears anything.
Step 4: Group students into a cohort
Still on Roster, further down, create a cohort. A cohort is just a named group: "Spring 2027 interns", "Nursing capstone", "Class of 2028".
You assess a cohort rather than the whole roster, so most institutions create one per programme, per term, or per placement group. A student can be in more than one.
Step 5: Open an assessment window
Open Assessments and create a window against that cohort.
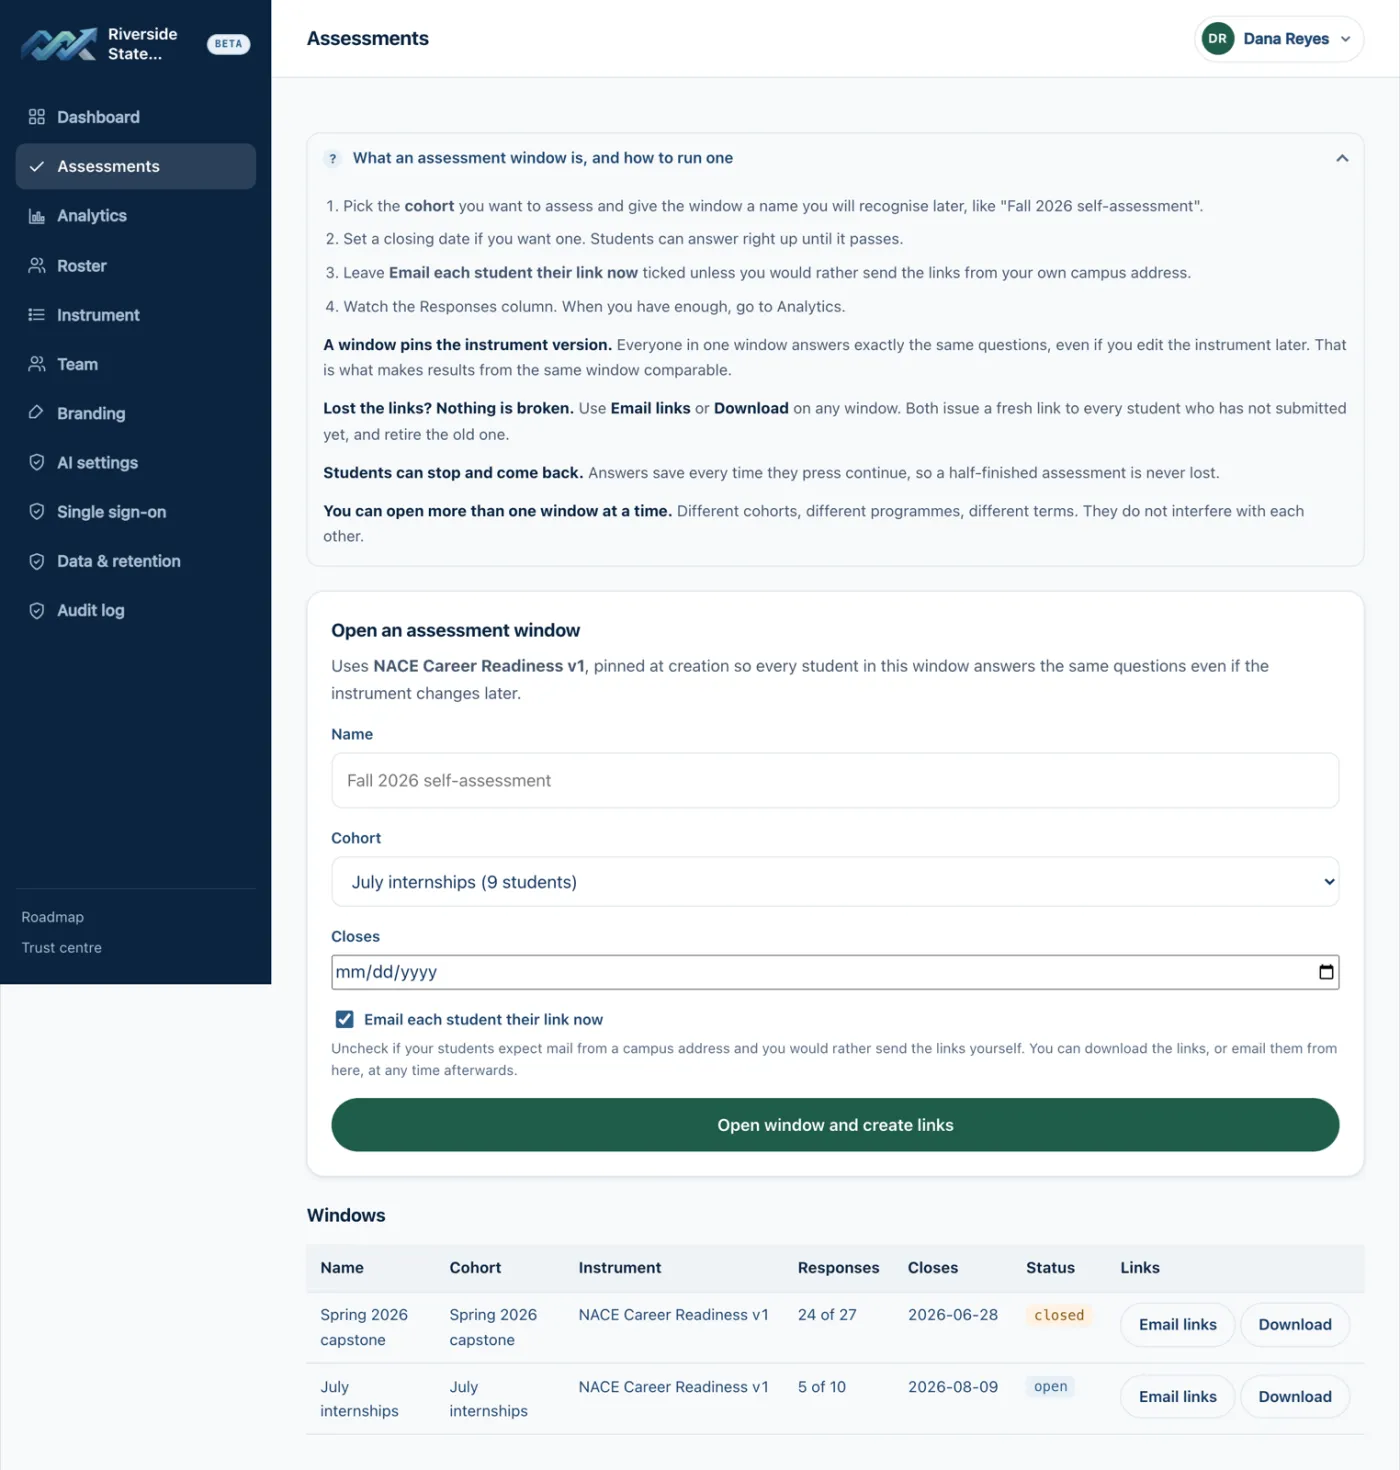
This is the step that emails your students. Each one gets their own private link. Give the window a name you will recognise later and a closing date if you want one.
Leave Email each student their link now ticked unless your students are trained to expect mail from a campus address, in which case untick it and use Download to get a CSV of links to send yourself.
A window pins the instrument version. Everyone in one window answers exactly the same questions even if you edit the instrument afterwards, which is what makes results from a window comparable.
If you lose the links, nothing is broken. Use Email links or Download on any window.
Either one issues a fresh link to every student who has not submitted yet, and retires the old one.
Step 6: What your students see
Students do not need an account. The link works on its own, with no password.
They answer around 26 short questions across the eight NACE competencies, taking about ten minutes. Answers save every time they continue, so they can stop and come back to the same link.
Two things students often ask:
- "Is this a test?" No. There is no pass mark and no right answer. It asks how often they
actually do certain things at work.
- "Not applicable" or a low score? Not applicable is a real answer, used when they have genuinely
never been in that situation. It is left out of the score rather than counted as a low one.
After submitting, the student sees their own report immediately.
Step 7: 360 feedback, which is where the value is
A student can invite people who have seen them work: a placement supervisor, a manager, a project instructor. Those people answer the same competencies about the student, from a link of their own, with no account, in about five minutes.
The report then shows both side by side, and the gap is the finding. Where a student rates themselves far above or far below the people who watched them work is the most useful information in the whole exercise.
Being rated higher than you rated yourself is extremely common and usually means underrating something you find easy. Neither direction is a failure.
Step 8: Read the results
Open Analytics.
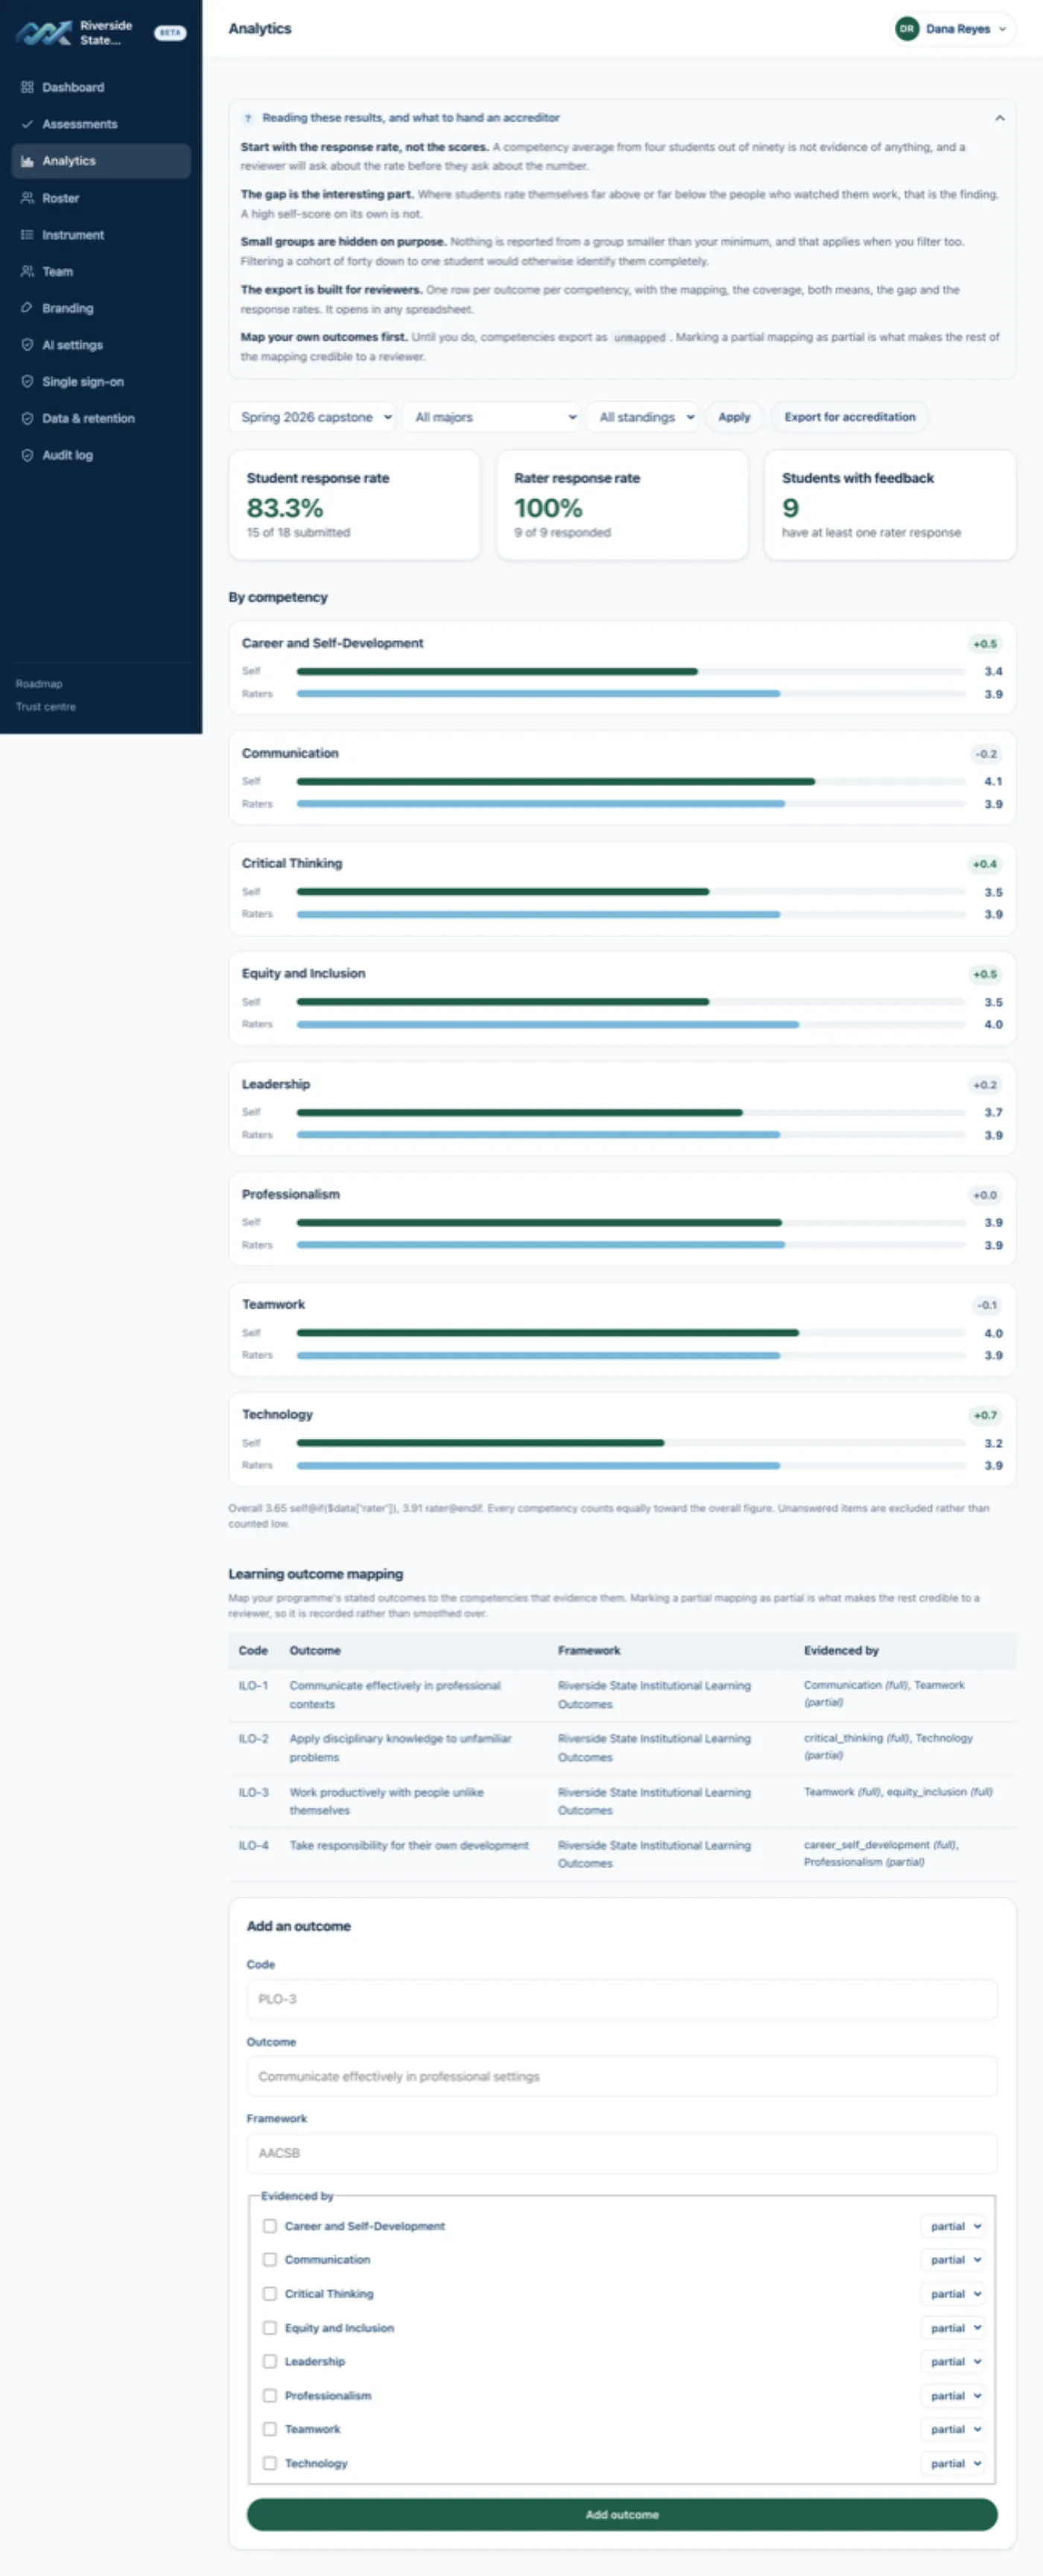
Start with the response rate, not the scores. A competency average from four students out of ninety is not evidence of anything, and a reviewer will ask about the rate before they ask about the number.
Small groups are hidden on purpose. Nothing is reported from a group smaller than your minimum, and that applies when you filter too: filtering a cohort of forty down to a single Biology student would otherwise identify them completely.
Step 9: Accreditation evidence
Map your own institutional learning outcomes to the competencies that evidence them, marking each mapping full or partial. Then export.
The CSV carries one row per outcome per competency, with the mapping, its coverage, both means, the gap and both response rates. It is built to be handed to a reviewer.
Marking a partial mapping as partial is what makes the rest of your mapping credible. Pretending a NACE competency maps one-to-one onto a programme outcome is what makes a reviewer stop believing the rest of it.
Optional: the instrument
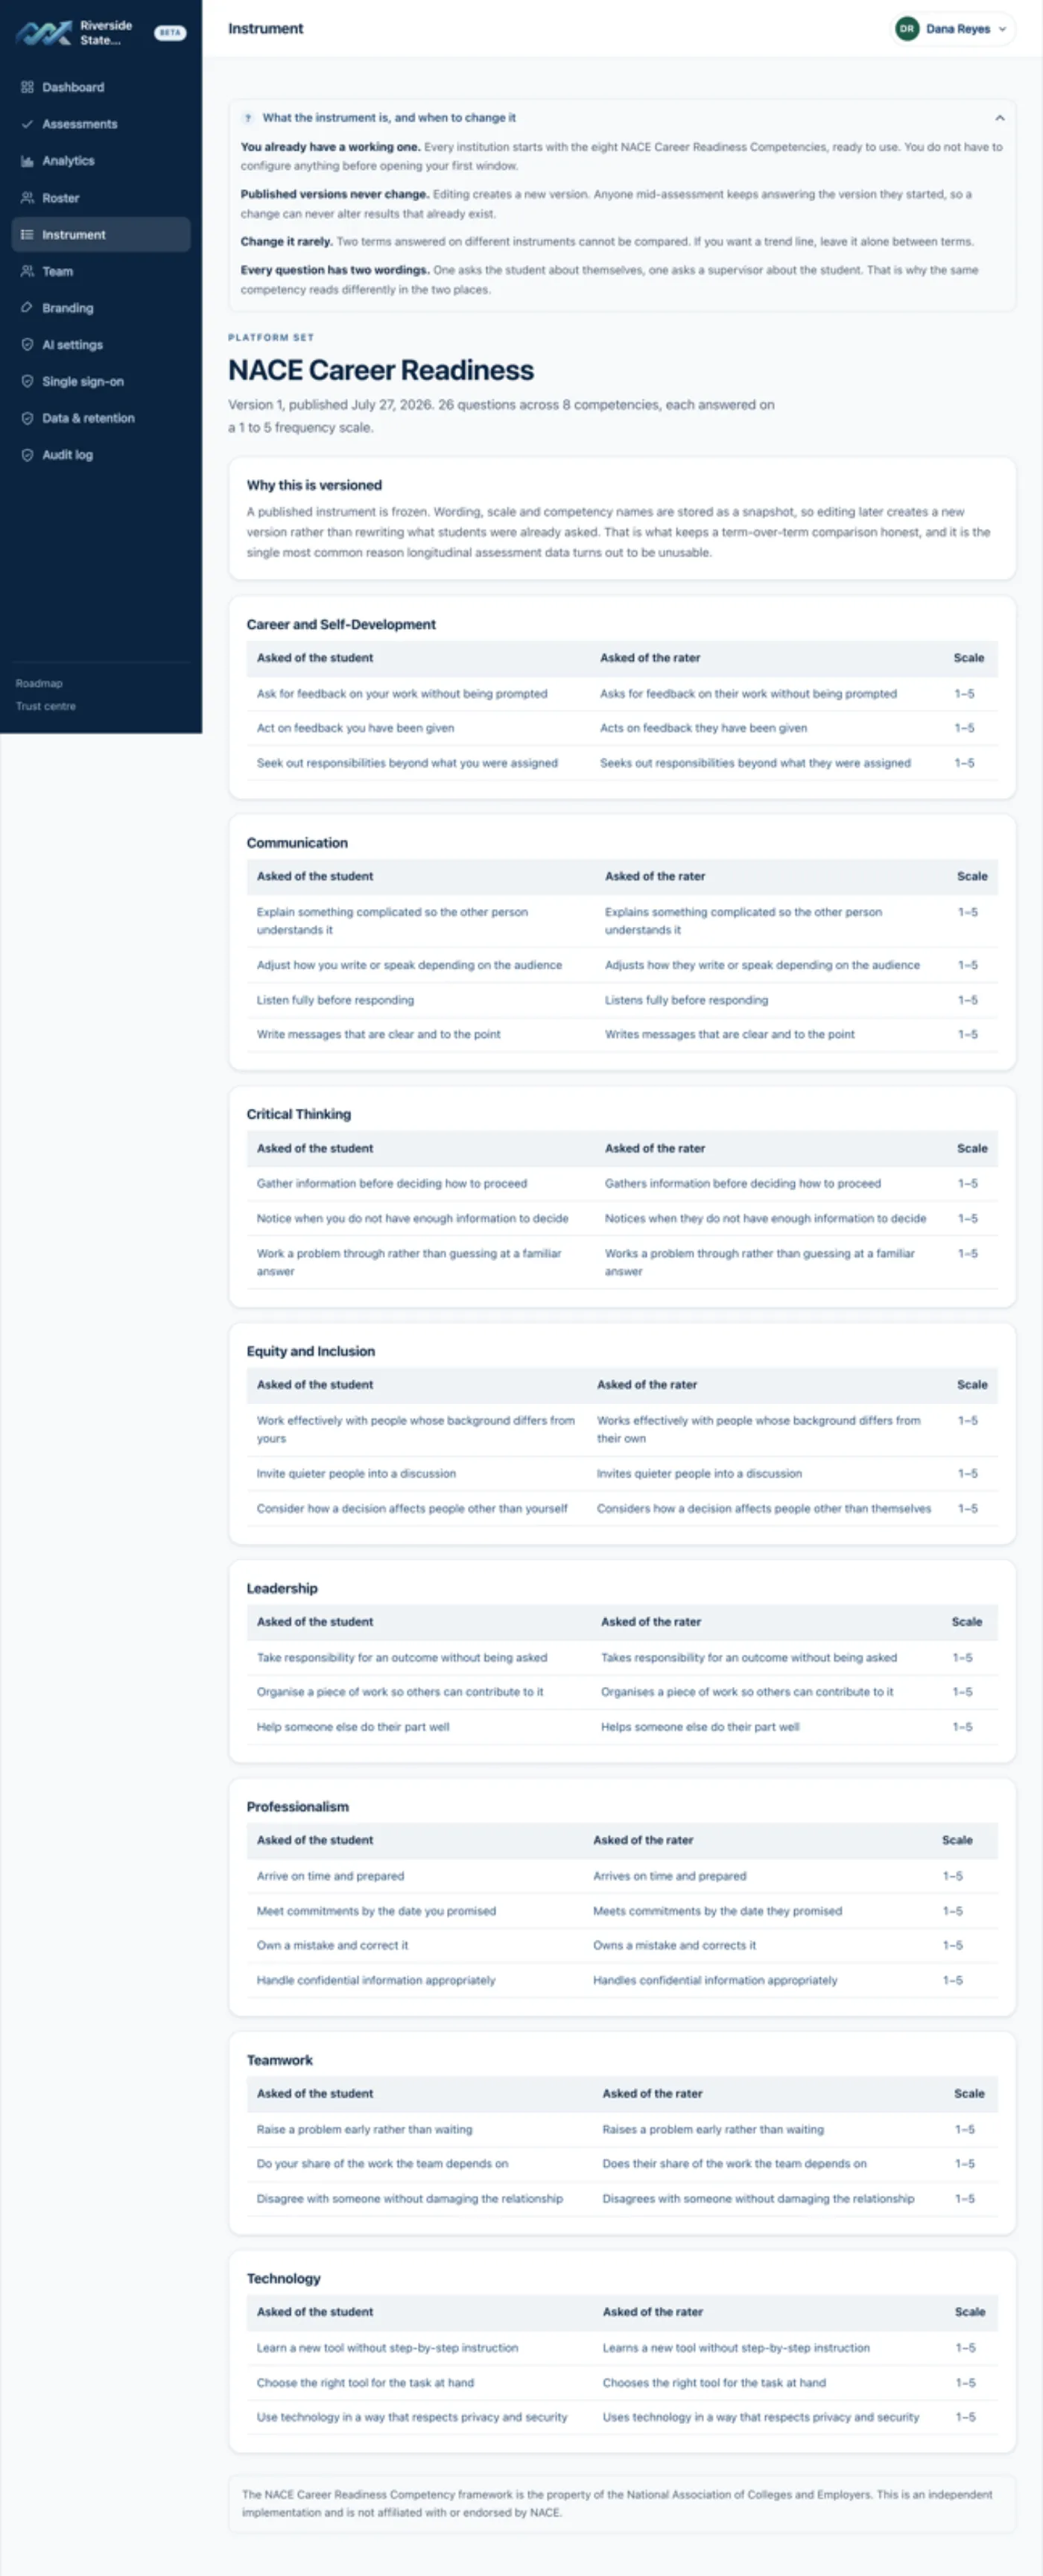
Every institution starts with the eight NACE Career Readiness Competencies, ready to go. You do not have to configure anything before your first window.
If you edit it, that creates a new version. Published versions never change, so anybody mid-assessment keeps answering what they started. Change it rarely: two terms answered on different instruments cannot be compared.
Optional: your branding, your team, your data
- Branding. Your logo and colour appear on the assessment, the report and every email we send on
your behalf. Until you set it, students see ours.
- Team. Invite colleagues as owner, administrator, staff or member. Students never appear here.
- Single sign-on. SAML or OpenID Connect, configured by your identity team. Optional; plenty of
institutions use email and password or the Google and Microsoft buttons instead.
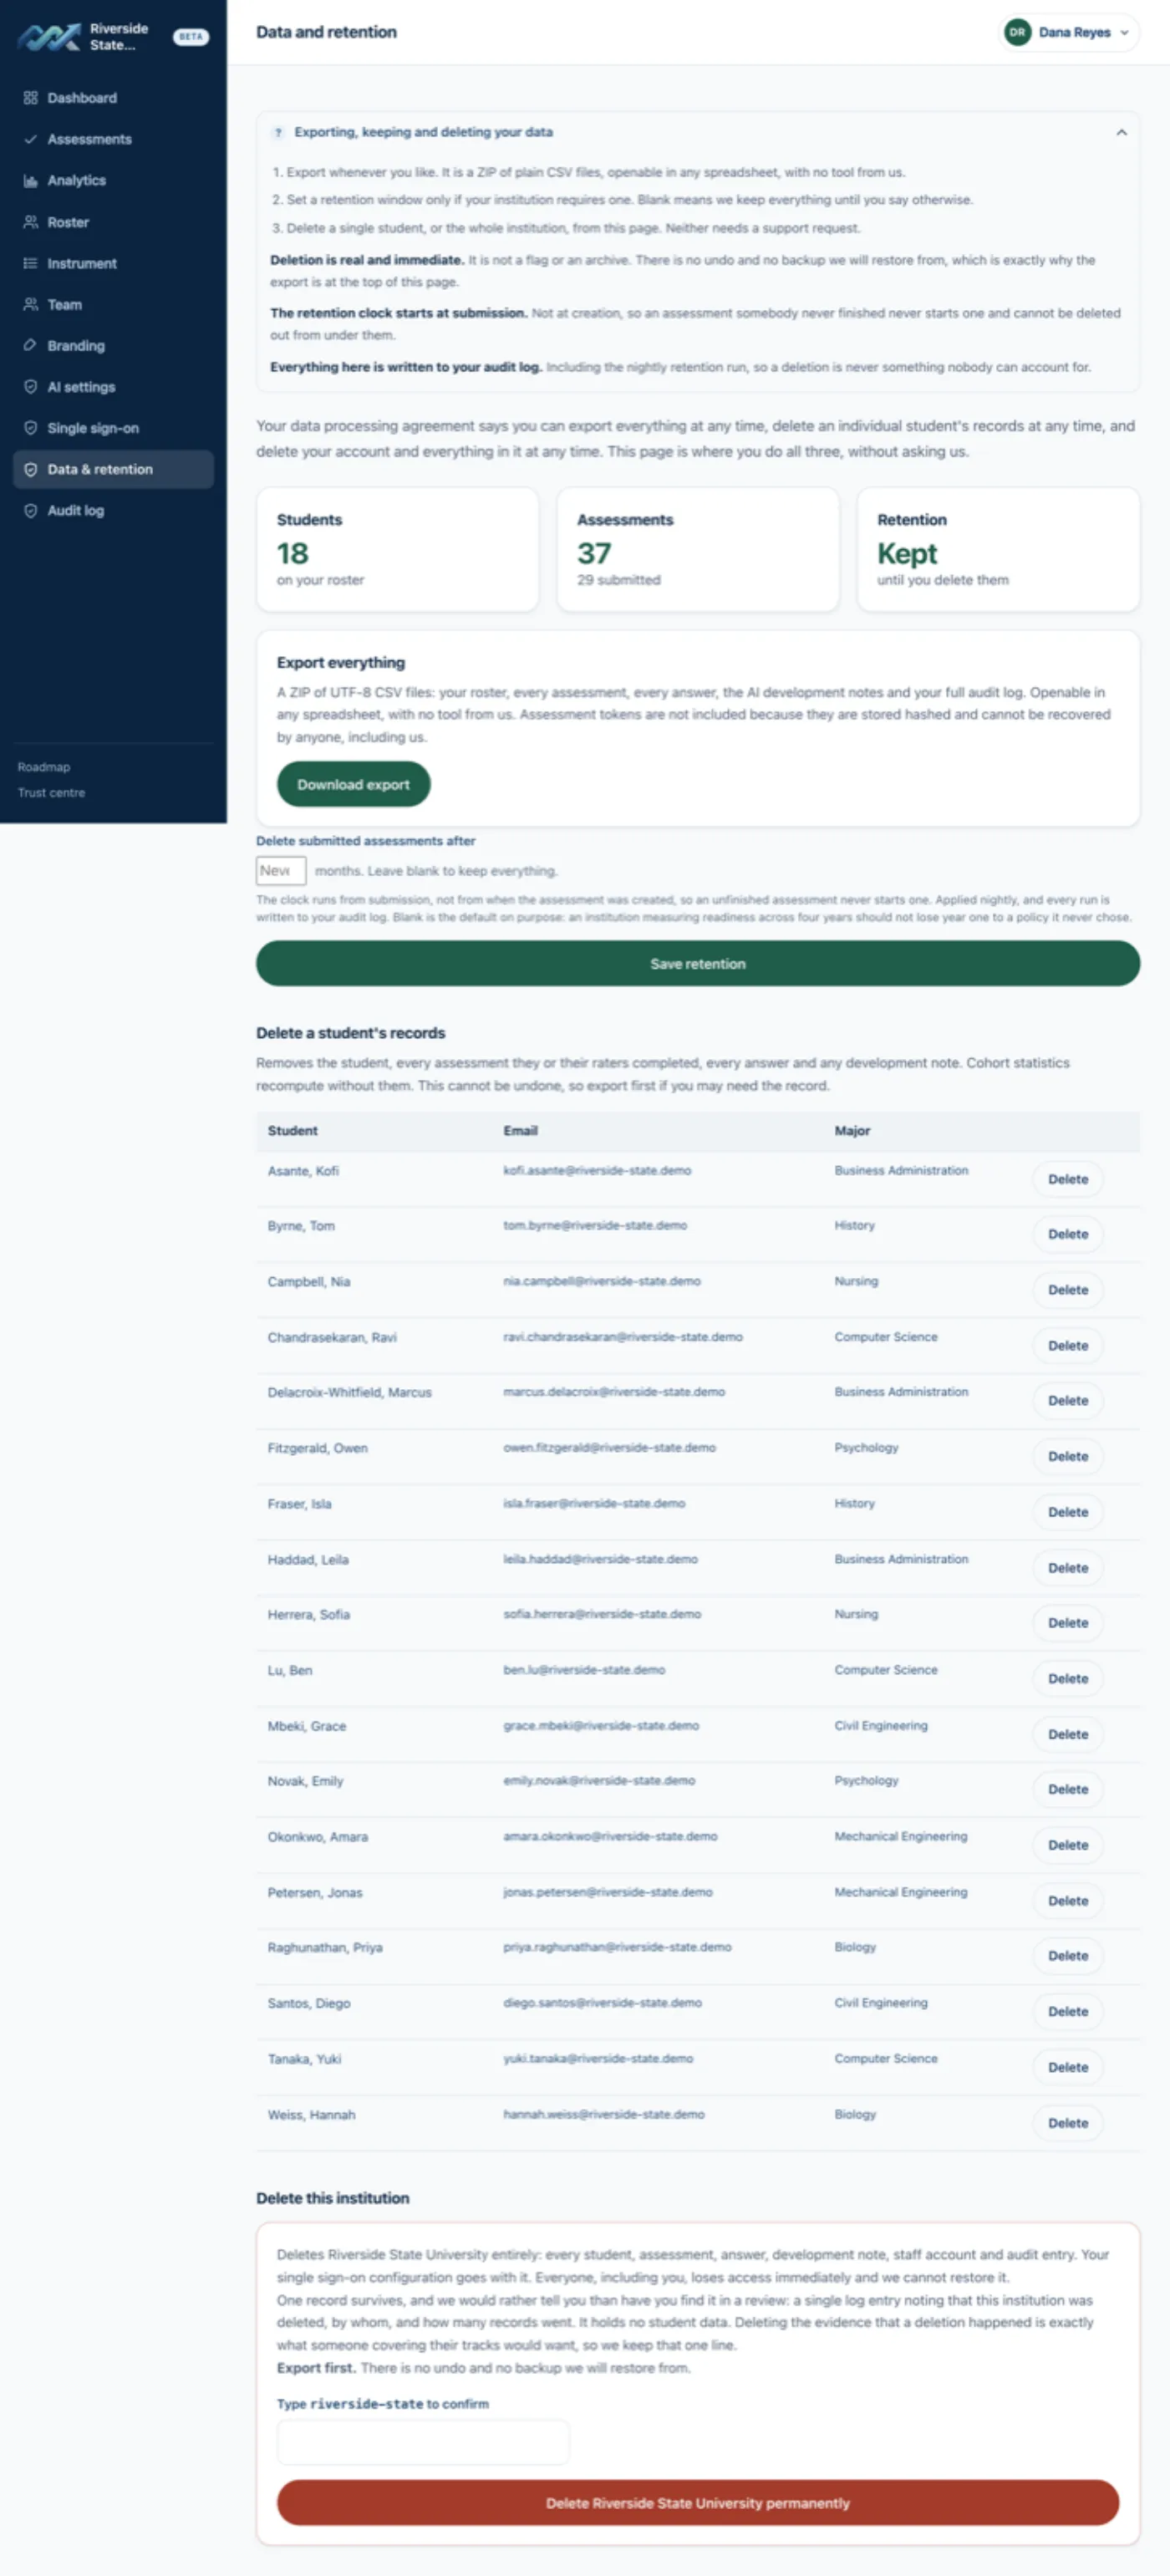
- Data and retention. Export everything as CSV at any time, set a retention window if your
institution requires one, delete a single student, or delete your entire account. None of it needs a support request, and deletion is real rather than a flag.
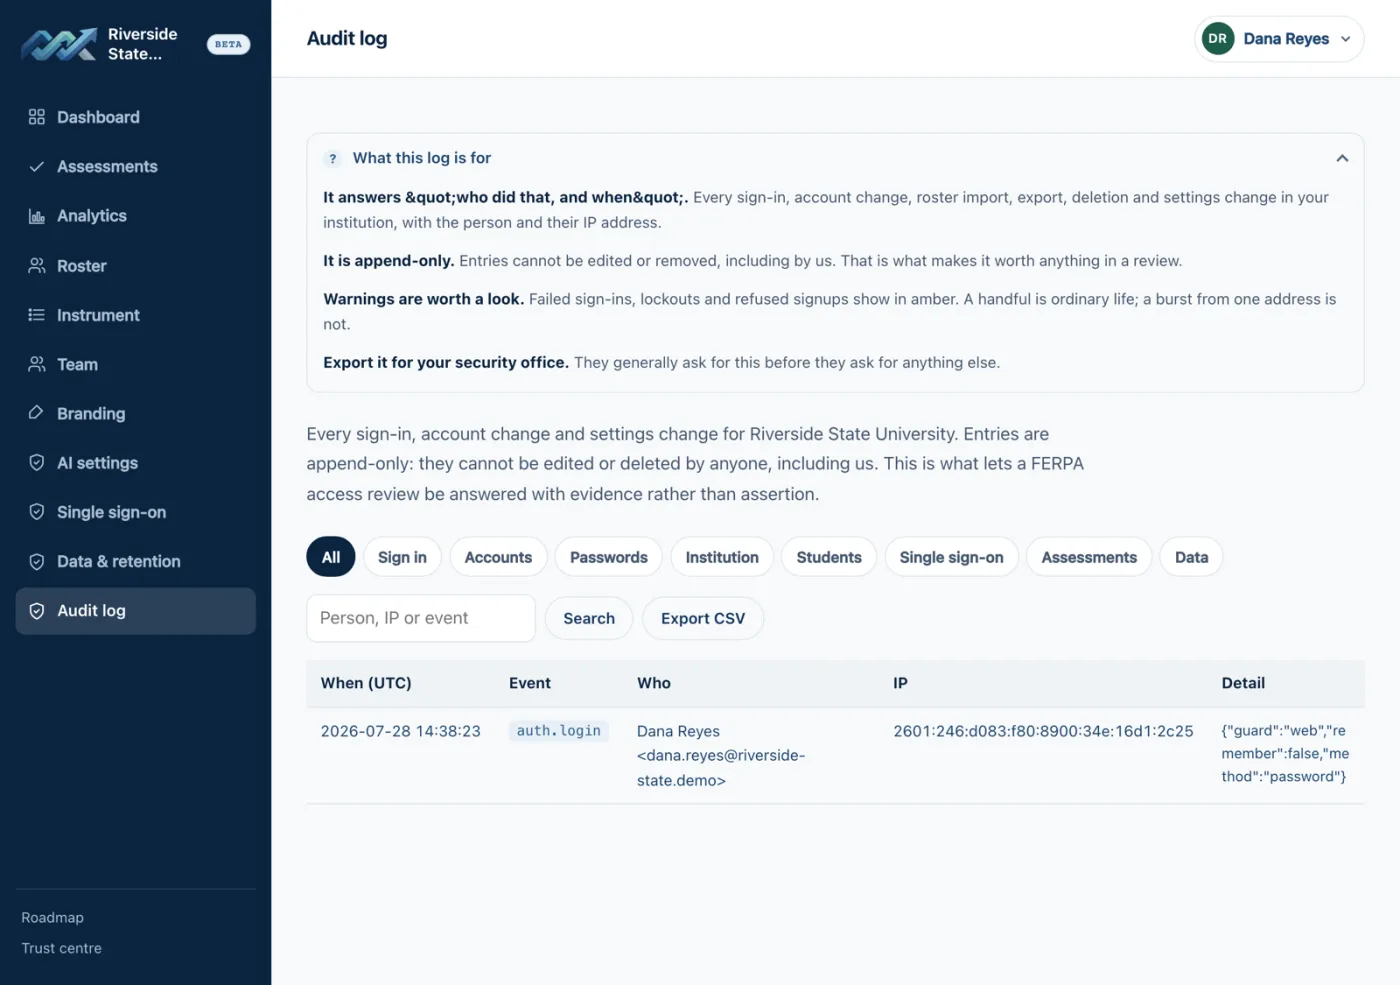
- Audit log. Every sign-in, settings change, import, export and deletion, append-only and
exportable. This is what answers a FERPA access review with evidence rather than assurances.
Common problems
A student says they never got the link. Check the Roster page: does their email address look right? Then use Email links on the window, which reissues to everyone who has not submitted.
A student cannot set up an account. They must use the address you have on the roster. We deliberately cannot tell them which address that is, because being able to check would let anyone find out who attends your institution. Tell them yourself.
LinkedIn does not work for a student signing up. Almost always, because their LinkedIn is on a personal address rather than the campus one you rostered. They should set up with their institution email first, then link LinkedIn from their account page, after which it works.
Analytics says results are suppressed. Fewer students have submitted than your minimum group size. That is the privacy floor doing its job. Wait for more responses, or lower the minimum if your institution's policy allows.
Nothing happened when I added a student. Correct. Adding to the roster emails nobody. Students hear from you when you open an assessment window.
What it costs
Nothing, permanently. Every feature, unlimited students, no contract, no card, no per-student charge. We are a software company that builds other things; this is not a loss leader with a price rise waiting behind it.
If you want the reasoning, the why it is free page explains it, and the trust centre has the security and compliance documents your IT department will ask for.
The Career Readiness Report is free for every college and university. Open now, in beta.
Create your institution